Hello. My code for the LED controller is not working. The web page is working fine, but the LED isn’t turning on. Here is the code: -
    <html>
    <head>
        <script type="text/javascript"
    src="http://cloud.boltiot.com/static/js/boltCommands.js">
        //This code must be there in all code for control or monitoring
        //Arduino type control and monitoring functions are pre-written in the boltCommands.js File
       </script>
        <script type="text/javascript">
        setKey('{API-KEY}','{BOLT3463174}'); // Default line must be present in every code
        setDebug(True); //Change Debug to true to get on screen alert messages of Command execution
        function changeImage(msg){ // Function to change the image when a button is clicked
         if(msg == "OFF"){
    		document.getElementById('myImage').src='http://www.clker.com/cliparts/0/X/y/m/X/2/grey-led-off-hi.png';
    		digitalWrite(0, LOW); //Arduino type function to control the state of one GPIO pin of Bolt
         }
        else{
    		document.getElementById('myImage').src='http://www.clker.com/cliparts/5/I/2/4/C/X/red-led-off-hi.png';
    		digitalWrite(0, HIGH); //Arduino type function to control the state of one GPIO pin of Bolt
         }
         }
       </script>
    </head>
    <body>
    <center>
        <button onclick='changeImage("ON")';
    style="height:50px;width:75px">ON</button>
       <img id="myImage"
    src="http://www.clker.com/cliparts/0/X/y/m/X/2/grey-led-off-hi.png"
    height="200" width="200">
        <button onclick='changeImage("OFF")';
    style="height:50px;width:75px">OFF</button>
    </center>
    </body>
    </html>
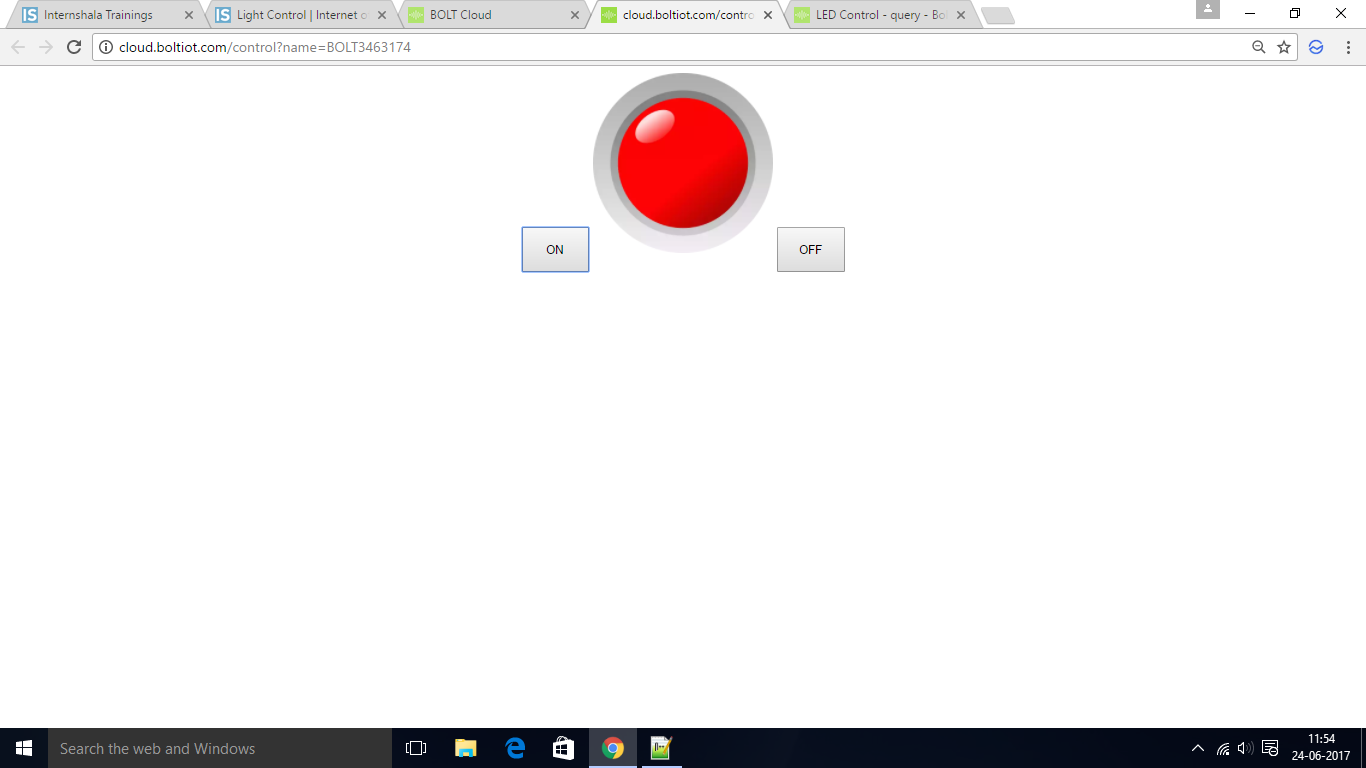
Any help on this would be appreciated. This is the web page, after clicking on.
Hi @banerjeesumitabha18,
Follow this instruction and let me know in case you need further assistance.
- Connect your bolt to the internet enabled WI-Fi network.
- Go to developer console and click on API tab.
- Now click on Generate API key and then enable the API key.
- Now upload your code to cloud and then link the HTML page to product and product to Device
Led Code -> Product ->Devices
- Now go to home page and click on Device Icon.
- Also, connect led at pin 0.(If you are changing the pin then change in code also.)
- Also, do console log in your browser and see is there is any error or warning message is there.
Do I need to add any hardware configuration for the device? Otherwise I have done all these steps but the led is still not turning on. Also, I don’t know how to open console log in the browser. Please tell me how to do that.
@banerjeesumitabha18,
For controlling things you don’t need hardware configuration.
To open console in chrome go to View -> Developer -> Javascript Console .
Also, download the code from here and upload it https://github.com/Inventrom/ui-templates/blob/master/Led%20Control/test_bulb.html
Its working now. Just had to remove the braces inside the setKey() function parameters. Thanks for the help.
Hi in the line,
setKey(’{{ApiKey}}’,’{{Name}}’); you have changed it to setKey(’{API=KEY}’,’{BOLT3463174}’). Please revert it back to as it is given in the code. as in the comments it is clearly mentioned // Default line must be present in every code
It has to be filled in with your own api key and device name. And the braces shouldn’t be there.
I am facing the same problem … n I did fill my own key n my own device’s name… n tried removing the braces bt still… my setup is not working… PLEASE HELP
Can u post ur code plz? Also make sure u have the proper connections and that u have successfully created the new device on the Bolt cloud, along with successful file upload.
Hi,
DO NOT EDIT that line. It is supposed to be as is in your code
Please don’t misguide others. Without your own api key and device name, the code would not work. And the braces are to be removed because if you read the boltCommands.js file carefully you will observe that the api key and device name are supposed to be provided as is, without any braces. Please don’t mislead others
Hi,
Please do check my profile, I wrote the code also the tutorials 
To clarify {{variable}} are called placeholders. These are in the code so the student or user doesnt have to take the trouble of copying his / her api_key or bolt id in the code. They are auto fetched from our servers when the file is loaded and setKey function is used as is in the code.
2 Likes
Being the instructor for the course, you should have made this clarification at the very beginning. In a classroom things don’t work like “Do this, just because I say so”. The concept of placeholders is nowhere explained in the tutorial, and looking at the code it looked obvious that we had to enter our own keys and names. I have only shared with other users what I did to get my device working. The explanation as to why we had to leave the code that way came very late, I believe.
That is true. Thank you for the feedback we shall implement the same in the tutorials.
This problem is occurs when the ‘api key’ is not enabled in the developer console.
1 Like
but its not working with the code you provided.
Hi,
ira.aishwarya 1st check your hardware connection is done properly. Then write the code provided in the bolt training section. If the net speed is good then it must work. After that if you facing the problem again then let me know.